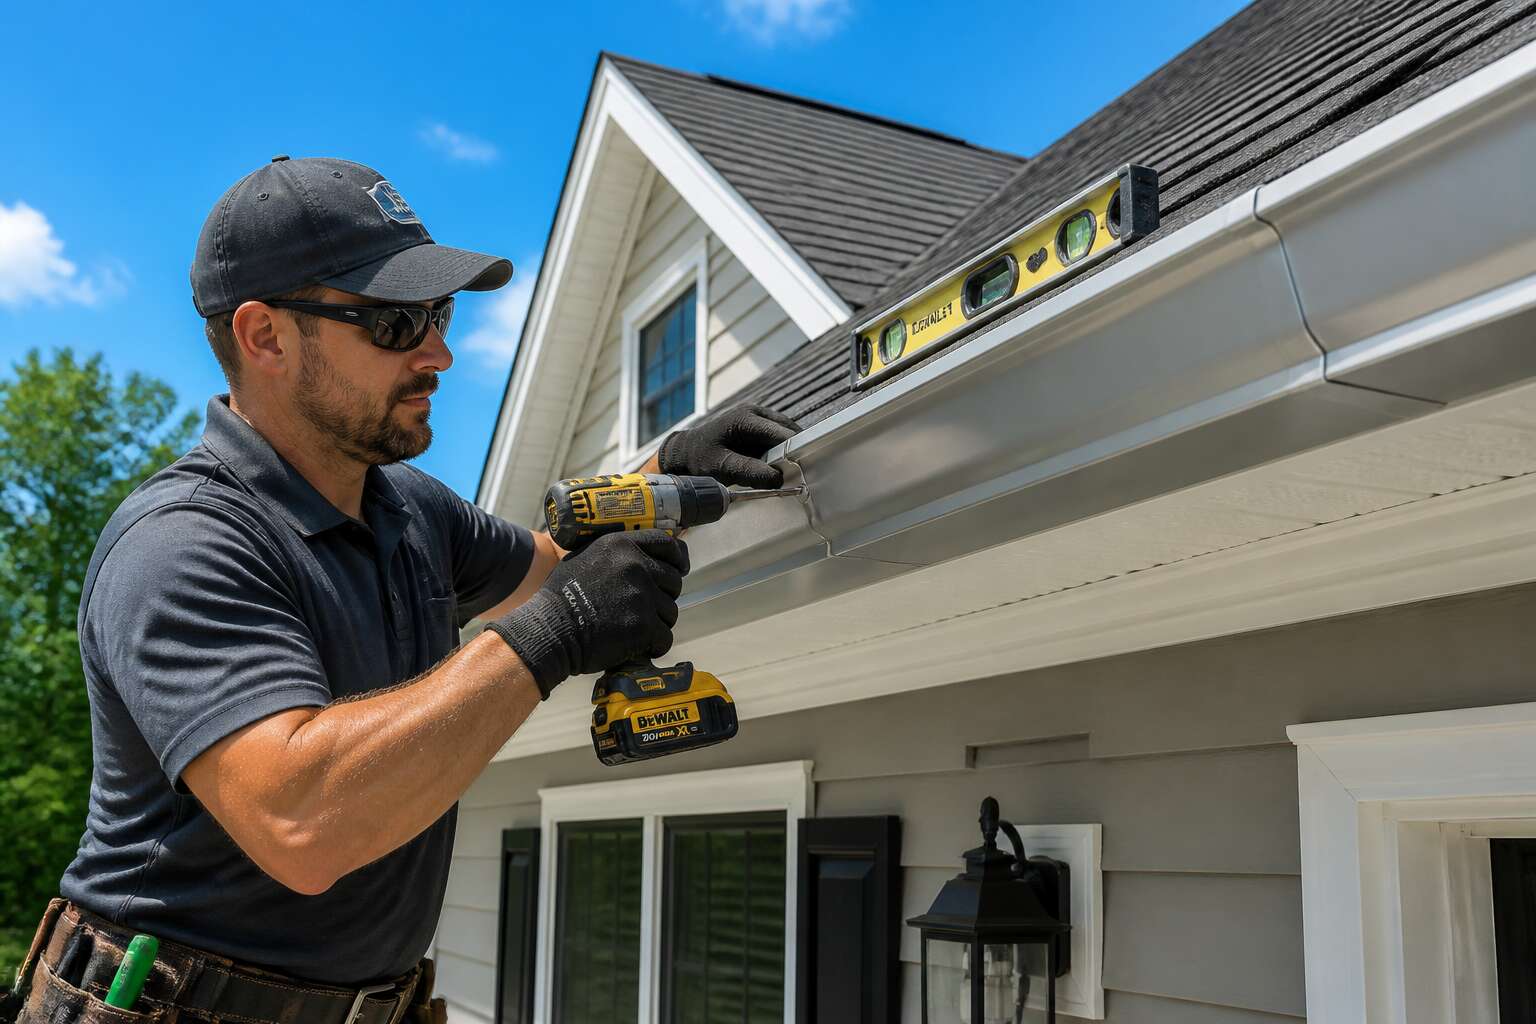
Signs Your Home Needs New Gutters
Visual Red Flags: Cracks, Rust, and Sagging Sections
Cracks meander along the gutter seams, yet many homeowners only notice them during a downpour. That is too late. Rust blooms in corners, flaking into the soil beneath, while sagging sections betray a system struggling under its own weight. These visual red flags rarely fix themselves. They point to failing fasteners, compromised pitch, or water pooling where it should not. The threshold for gutter installation should be reached long before water spills over the fascia.
Look closely for hairline fractures running parallel to the gutter wall, orange-brown rust streaks deepening near joints, and a visible dip in the roofline. Each signals a deeper structural issue. A professional gutter installation that accounts for South Africa’s harsh sun and sudden storms becomes the difference between a sound home and one slowly eroding. Do not wait for the next heavy rainfall! The evidence is already there, in rust and crooked lines.
Foundation Damage and Basement Flooding
In South Africa, expansive clay soils shift with every drop of rain, and your foundation feels it first. When gutters fail to channel water away, runoff pools against the base of your home. That is when you notice hairline cracks creeping up the walls, doors sticking in their frames, or a damp mustiness in the basement. These are not quirks. They are symptoms of hydrostatic pressure. A proper gutter installation, with downspouts extending well past the foundation, prevents this silent soaking.
Basement flooding often starts as a faint watermark on the skirting board, ignored until the first storm turns your storage room into a wading pool. Look closer:
– Efflorescence, that chalky white residue on interior walls, signals moisture migrating through concrete.
– Peeling paint near the floor line, not the ceiling, points to rising damp.
– Puddles forming along the exterior wall after a light drizzle, even without rain, suggest poor drainage direction.
Each sign means water is winning. A new gutter system directs every drop to where it belongs, far from your foundation. Do not wait for the next downpour to make the decision for you. Your basement will thank you, and so will your sanity.
Overflowing Water During Light Rainfall
A light rainfall in Johannesburg should never produce a waterfall off your roofline. Yet many homeowners watch their gutters spill over during a drizzle, a sign the system cannot cope.
Overflow during light rain means the troughs cannot manage even minimal water volume. Leaves, nests, and sediment may have narrowed the channel. Or the slope has shifted, leaving water to pool and crest.
- Water cascading over the front edge, not the corners
- A persistent drip line along the fascia after the rain stops
- Gutter joints weeping water before the ground absorbs a drop
Each of these tells you the existing setup is insufficient. A professional gutter installation reestablishes proper pitch and capacity, channeling every drop away before it finds a weakness. Ignore the overflow now, and the next storm will cause greater problems.
Choosing the Right Gutter Material
Comparing Cost vs. Longevity
How many rands have you spent on a house that refuses to drain properly? After two decades across South African suburbs, I have learned that material determines the true cost of any gutter installation. Copper turns a roof into a landmark, yet most homeowners compare steel against aluminium and move on.
Steel deflects dents but rusts where paint chips along the seams. Aluminium stays corrosion free, though it buckles under a tree branch. A short list clarifies the trade off:
- Galvanised steel lasts twenty years if you maintain the coating.
- Colorbond steel stretches to forty with zero care.
- Aluminium offers twenty five years before the finish fades.
- Zinc and copper push past a century, though the initial quote for a gutter installation startles.
The upfront numbers mislead. A cheaper material fails sooner, and replacement labour dwarfs the original savings. The rainfall in your region and the chosen gauge will determine whether those winter storms become a recurring expense.
Weight and Durability Factors
The heft of a gutter section speaks before it is even lifted. A lightweight aluminium profile feels almost insubstantial in the hands, promising easy handling but hinting at its vulnerability under a heavy branch or a ladder propped too carelessly. That same lightness can translate into a quieter, simpler gutter installation, yet the material’s softness demands respect. A heavier gauge of the same aluminium, however, shifts the balance entirely, adding rigidity without sacrificing corrosion resistance. Zinc offers a different weight entirely, a dense, solid feel that reassures.
Professionals factor this into every quote for a gutter installation, because the physical mass dictates how the fascia bears the load. A robust profile requires secure fixing points, and the long term performance depends on that marriage. Consider the common choices:
– Aluminium: light and easy to cut, but thinner gauges distort easily under impact.
– Steel: heavy and rigid, offering superior dent resistance, though requiring a flawless coating to survive coastal air.
– Zinc: dense and durable, with a weight that feels permanent and a lifespan that often outlasts the roof itself.
This weight, this physical presence, matters more than the colour chart. The durability of the system begins with the honesty of its material and the care of its installation, not the shine of its finish.
Appearance and Home Exterior Design
Colour harmonises with the architecture, not the neighbour’s preference. In South African light, a pale profile reflects heat while a dark one absorbs it, affecting both the home’s face and its thermal behaviour. The material itself imposes constraints. Powder coated finishes conceal minor scratches, while mill finish aluminium develops a weathering patina that some owners find honest.
For a balanced exterior, consider three variables:
- Roof material and pitch, which dictate visual weight.
- Wall tone and texture, where matte or gloss changes perception.
- Gutter profile shape, whether rectangular or ogee, aligning with the building period.
These decisions precede any gutter installation from a cost perspective, but they carry equal weight in the final impression. The right profile reads as intentional, not accidental, and that intention is what distinguishes a refined facade from a patchwork of component parts.
Exploring Gutter Styles and Sizes
K-Style vs. Fascia-Mounted vs. Half-Round
Choosing a gutter profile feels like a small decision until a Durban thunderstorm arrives. The shape dictates how much water your roof diverts, and that affects every part of your home’s foundation. K-style gutters offer a flat back and a decorative front, which makes them easy to mount against a fascia board. Fascia-mounted options work well on modern homes where the roofline lacks a protruding edge. Half-round gutters, with their open trough design, appear on older Cape Dutch properties but require precise fitting to avoid overshooting during heavy rain.
Size matters more than you think. A standard 125mm gutter handles most residential roofs, but wide eaves or steep pitches need 150mm. Consider these factors:
- Roof area and pitch
- Rainfall intensity in your region
- Distance between downpipes
Picking the correct size prevents overflow, yet many homeowners fight with undersized channels. The best gutter installation services measure the effective roof area, not the floor plan. Half-round gutters look elegant, but they demand more hangers to stay level, especially in windy areas. Match the style to your architectural reality, and the rest takes care of itself.
Residential Standard Sizes: 5-Inch and 6-Inch
At the same pitch, a 6 inch gutter moves roughly 40% more water than a 5 inch. That gap matters once a Durban thunderstorm decides to test your roofline.
Residential standard sizes in South Africa are 125mm (5 inch) and 150mm (6 inch). The smaller profile handles most suburban roofs with moderate pitch. The larger profile suits steep roofs, wide eaves, or coastal properties where rainfall exceeds 1000mm annually.
A professional gutter installation starts with a volume calculation, not a visual guess. The calculation covers:
- Your roof’s effective drainage area, measured from the eaves, not the floor plan
- Downpipe spacing and diameter, which determine how fast water exits
- The local rainfall intensity figure used for your region
A well-angled 5 inch with extra downpipes outperforms a poorly placed 6 inch. The reverse is just as common. Many homeowners pay for larger gutters when the real fix is a smarter gutter installation design.
Custom Box Gutters for Architectural Fit
South Africa’s older suburbs carry a quiet detail: many Cape Dutch and Victorian homes were built with box gutters tucked into the roofline. A custom box gutter sits concealed between roof slopes or behind parapets, which suits flat roofs and minimalist architecture. The hidden trough collects water at the base of the slope through outlets invisible from ground level.
Box gutters demand careful waterproofing and precise fall gradients. Standing water causes rot. When specifying one for a renovation, the width and depth must account for roof pitch and local rainfall intensity. A professional gutter installation always reviews municipal stormwater data first.
For the architectural fit, weigh these factors:
- Parapet height limits the box gutter’s maximum width
- Internal corners need deeper profiles to prevent overflow
- Flat roofs transfer more water to the box during downpours
Some owners choose a larger box while downpipe placement limits the system. The box stores water; downpipes do the work. A balanced outlet design outperforms a deeper box with few exits, so gutter installation budgets should prioritise pipe spacing.
Downspout Sizing for Maximum Flow
A single downpipe handles only so much water. On a Highveld thunderstorm, a 50 mm downpipe moves about 4.5 litres per second. That works until one roof slope feeds two gutter outlets into a single pipe. Downspout sizing decides whether your system flows or overflows.
The rule is direct: wider downpipes drain larger roof areas. A 65 mm downpipe nearly doubles capacity. But width alone is not enough. The outlet position and the vertical drop change how much water moves. Most homes space downpipes 8 to 12 metres apart.
Key considerations:
– A 75 mm downpipe suits most residential roofs.
– A 100 mm downpipe handles intense rainfall events.
– Calculate the effective roof area before choosing.
Downspout sizing is where gutter installation succeeds or fails. Balance the number of downpipes with the stormwater system.
Planning a Seamless Fit Around Your Home
Measuring Your Roofline Accurately
Accurate measurement demands respect for the roof’s geometry. A single misread angle can throw off the entire gutter installation, leaving gaps where water gathers. Start by working from the fascia board, not the old gutter, as decades of weather twist those numbers.
Use a laser distance finder for consistency. On pitched roofs, measure each run independently, because subtle settlements alter the plane. Then check for the drip edge’s protrusion, as it dictates how far the fascia sits from the roofline.
- Mark the roof’s highest point as a reference.
- Take three measurements per section, at the ends and middle.
- Record them before moving the ladder.
This precision does more than ensure a seamless look; it reduces the chance of stress fractures later. Such care makes the gutter installation feel inevitable, not forced.
Computing the Right Slope for Drainage
Planning a seamless fit around your home is less about sheer force and more about understanding the house’s own rhythm. The roof settles, the walls breathe, and a single continuous piece of metal will fight that movement. A successful gutter installation anticipates these shifts with expansion joints placed at strategic intervals, often where two runs meet. This allows the system to move without stressing the fasteners or pulling away from the fascia.
When computing the right slope for drainage, remember that water will not negotiate. It demands a consistent, unhesitating path. The standard ratio to keep in mind:
– Quarter-inch drop for every ten feet of gutter run
– Adjust this to a half-inch for long, unobstructed roof faces
– Increase the slope only if the fascia is perfectly level to avoid puddling
A slight twist on longer sections creates a visible trough that catches the eye in a bad way. The precision required here is proof of skilled gutter installation, turning a potential nuisance into a quiet accomplice of your home’s defenses.
Understanding Proper Hanger Spacing
Proper hanger spacing determines a seamless fit. I have watched gutters pull away from the fascia because the clips sat too far apart. For most homes, 24 inch spacing works, but 18 inches offers extra security in heavy rainfall regions. Consider this:
- Measure the distance between rafters to align hangers with solid wood.
- Use hidden hangers to avoid drilling visible holes that invite rust.
- Check the gutter’s front edge, which often needs support every 18 inches.
Spacing is not a uniform rule! A skilled gutter installation reads the roofline and adjusts. The metal expands and contracts, so hangers must allow slight movement without losing grip. When you get this right, the system stays quiet and secure through every storm.
Mapping Water Flow Away from the Foundation
The path water takes after leaving your roofline is as important as the gutter installation itself. Walk your property during a downpour and watch where runoff pools. That evidence tells you more than any blueprint.
South African homes often face clay soils that swell and shift. If water lingers near the foundation, the ground expands and presses against walls. Map every slope and paved surface. Direct discharge toward storm drains or absorbent garden beds. Consider these factors when positioning outlets:
- Distance from the foundation wall
- Local municipal drainage requirements
- Existing terracing or retaining walls
A seamless fit means the entire system works as one unit, guiding water from the roof edge to a safe release point.
Fascia Board Inspection and Repair
Your fascia board carries the entire gutter system, and it takes a beating in South Africa. Summer sun bakes the timber, Highveld storms hammer it, and coastal moisture settles in behind the paint. What appears solid from the ground often hides rot, splits, or loose mitred joints when you look up close.
A proper fascia board inspection covers specific trouble spots:
- Feel along the underside for soft timber or swelling.
- Look at every joint where boards meet at corners.
- Check where brackets attach, because that is where stress concentrates.
These checks matter because a failing fascia board compromises any gutter installation. A proper gutter installation relies on fascia that can hold the brackets firmly. If the timber has rotted behind the brackets, the new gutters will pull free within a few seasons. Repair the fascia first, and the seamless fit you planned for will actually stay put!
Step-by-Step Guide to Replacing Outdated Gutters
Preparing the Work Area: Protecting Siding and Landscaping
Preparation determines whether a gutter installation proceeds without collateral damage. South African homes often feature facebrick walls and established gardens that can suffer under a shower of debris. Before lifting a single section, cover sensitive plants with drop cloths or thin plywood sheeting. Remove fragile potted items from the immediate perimeter. Use a ladder stabiliser to keep your weight off the gutters themselves, and tape protective film over the siding near any working area to prevent scratches from ladders or tools.
A simple checklist keeps the process orderly:
- Mark the location of underground water pipes or irrigation lines before driving any stakes.
- Trim overhanging branches that obstruct access to the roofline.
- Lay down heavy duty tarps to catch old fasteners and sealant globs.
Investing this time upfront protects the property’s envelope and ensures the gutter installation follows a clean path without unsightly dents or trampled beds.
Removing Old Gutter Sections and Fasteners
Removing old gutters requires precision, not force. Work in sections, starting at the downspout end. Use a pry bar to lift fasteners from the fascia board, but expect old sealant to resist. Apply controlled pressure to break that bond. If a section refuses to budge, cut the fasteners instead of twisting the gutter. This protects the roofline and the siding. Follow this sequence for each run:
- Remove end caps with a flat bar to release the gutter section.
- Cut stubborn fasteners with an oscillating multi-tool.
- Lower each piece with a rope to avoid damaging your garden.
After every hanger comes off, inspect the fascia for rot. Ignoring this now will compromise your new gutter installation. Once the old metal is cleared, the surface is ready for the next stage.
Cutting New Sections to Precise Angles
The old sections are down. Now comes the real work, cutting new sections to precise angles. This stage determines whether your gutter installation performs or fails.
Measure each fascia run, then transfer those numbers to the new channel. Account for the mitre at each corner. Most corners sit at 90 degrees, but some homes present odd angles, especially around bay windows.
Use the right tool for the material:
- Mark the cut with a wax pencil.
- Set your mitre saw to the exact angle.
- Cut slowly to avoid bending the metal.
Test-fit each piece against the fascia before you attach hangers. Small adjustments are easier on the ground than on a ladder. Dry-fit the entire run to confirm joints align before you complete the gutter installation.
Securing Gutters with Hidden Hangers vs. Spikes
Securing new gutters is where many DIY efforts falter, but the choice of fasteners dictates decades of performance. Traditional spikes and ferrules, long rods hammered through the front lip, rely on sheer force and often loosen as seasons shift. This movement breaks seals and causes sagging. Hidden hangers, however, anchor beneath the cover, distributing load across the fascia without visible intrusion. They are the superior option for a lasting gutter installation.
Consider these distinctions when planning your approach:
– Spikes require a second person for alignment and can tear out during ice dams.
– Hidden hangers attach with stainless steel screws, offering structural rigidity.
– The concealed profile prevents debris buildup at the fastener point.
For South African homes enduring highveld thunderstorms and coastal humidity, the mechanical grip of hangers prevents the gradual pull that plagues spike systems. Proper spacing, roughly 600mm apart, ensures water flows uninterrupted to the downspout. A gutter installation with hidden hangers may cost more initially, but the reliability during heavy downpours is unmatched. The fascia remains protected from moisture intrusion, and the system maintains its slope without compromise. Choose the method that supports the entire water management network, not just the visible exterior.
Waterproofing Seams, Corners, and End Caps
A single unsealed seam will quietly channel thousands of litres onto your foundation every Highveld thunder season. I have inspected hundreds of gutter systems, and the ones that fail early almost always share one trait: rushed sealing work during installation.
- Clean both mating surfaces with a solvent based cleaner.
- Apply a polyurethane sealant in a continuous bead.
- Press sections fully together and wipe off excess before it skins.
End caps deserve the same attention. Crimping creates a mechanical lock, while sealant provides the true barrier. Matching the sealant to your climate matters; coastal salt air and Highveld UV will degrade cheap products within months. A durable gutter installation always pays attention to the joints that others overlook.
Connecting Downspouts, Elbows, and Splash Guards
The real test of any gutter installation happens when the rain hits the downpipe. Downspouts carry runoff from the roofline to ground level, and elbows handle the direction changes at the wall. Use two elbows per downspout, never one, because a single bend creates back pressure and slows the flow. This is a common error in older systems I have seen.
Attach the downspout to the wall with brackets spaced no further than one metre apart. Each section should overlap the one below it, with the crimped end facing upward to shed water cleanly. Splash guards at the base redirect the discharge away from your foundation and prevent soil erosion around the house.
Connect the downspout to the gutter outlet in the right order:
- Apply sealant to the outlet flange.
- Twist the downspout connector into place.
- Fit the offset elbows and trim the downpipe to length.
This sequence keeps the entire run aligned and leak free, the hallmark of a reliable gutter installation.
Final Touches and Ongoing Maintenance Tips
Adding Gutter Guards to Minimize Clogging
The quiet dignity of a well-made gutter system often goes unnoticed, much like a butler who anticipates every need without being asked. Your investment in professional gutter installation deserves a final chapter of thoughtful care. Proper downspout positioning with a slight outward angle from the foundation wall completes the initial phase, but the ongoing relationship with your guttering requires a pragmatic schedule. For homes surrounded by oak trees or those infamous jacarandas, the chore of clearing debris becomes a recurring narrative. Many homeowners find that installing gutter guards minimises this particular social obligation altogether.
Consider the protective layer of a gutter guard as a polite gatekeeper for your drainage network. It permits rainwater to pass while turning away leaves, twigs, and the occasional wayward tennis ball. The choices available for this screening are numerous and vary in their level of filtration:
– A perforated metal screen that relies on surface tension for water flow
– A fine mesh system that captures even the smallest pine needles
– A foam insert that sits within the trough itself, blocking organic matter from accumulating
While no guard eliminates the need for occasional inspection, it does extend the interval between significant cleaning sessions. The mannerly homeowner in Pretoria or Cape Town will still peer upwards after a storm, ensuring that nothing has shifted. A compressed air blower or a simple garden hose with a spray nozzle can flush away any lingering sediment without dismantling the protective system. This attention to detail preserves the flawless function of your original gutter installation, ensuring the entire ensemble continues to perform its quiet duties for many seasons to come.
Testing for Leaks and Applying Fresh Sealant
After a storm, the true test begins. Walk along the roofline and inspect every seam, corner, and end cap for slow drips. A single bead of failed sealant can redirect water exactly where it should not go. Testing for leaks is a straightforward task. Press a finger along each joint; any soft or sticky spot indicates the old sealant has broken down.
Applying fresh sealant requires patience. Remove the old material with a putty knife, then wipe the surface with a solvent to remove grease and dust. Use a polyurethane sealant that remains flexible in South African heat. A steady hand creates a smooth, continuous bead.
- Check downspout connections for loose joints
- Inspect hanger brackets for movement
- Clear sediment from the gutter guard surface
This short checklist, completed twice a year, protects your gutter installation from premature failure. The entire process takes under an hour and costs very little.
DIY Effort vs. Hiring a Professional Contractor
Pros of Working with a Licensed Gutter Specialist
DIY gutter installation rarely stays a one-weekend project. The slope that looks perfect from the ground often collects standing water by the third month. A licensed specialist measures each section against the actual roofline, not a chalk line, and tightens every hanger to a torque that prevents fastener fatigue.
Hiring a professional contractor also removes the question of who pays for a scratched fascia or a bent downspout. Licensed gutter specialists carry public liability insurance and offer workmanship guarantees that define accountability clearly. That is a real advantage!
- They confirm downspout positions before drilling any holes.
- They use riveted joints rather than relying on caulk alone.
Your gutter installation quote should include weatherproofing measures that DIY guides often skip, such as flashing behind the gutter lip. For South African winters, that extra layer prevents corrosion from acidic oak leaves and salt-laden coastal air.
Hidden Costs That Catch DIYers Off Guard
A DIY gutter installation starts with a modest budget and ends with a hardware store employee recognising you by name. The crimping tool costs R900 alone, the ladder hire quietly eats the difference, and the one coil of gutters you measured wrong cannot be returned once cut.
- Material restocking fees after a miscalculated corner
- New downspout elbows when the first set bends at the wrong angle
- Fascia repair costs after a shifting ladder does its worst
A professional quote looks painful up front. It covers the full gutter installation, the specialised tooling, and the errors someone else absorbs. The DIY version simply hides that arithmetic until the invoice arrives in the form of three separate weekend trips and a sore back.
Understanding Warranties and Material Guarantees
The average homeowner who attempts a DIY gutter installation discovers that effort compounds quickly. Ladder positioning, angle cutting, and sealant application all require precision. A contractor executes these steps with trained teams and proper equipment. That reduces the time from three weekends to one day, and it lowers the risk of injury!
Understanding warranties and material guarantees protects your investment. Many manufacturers void coverage if the system was not installed by a certified professional. A contractor offers a workmanship guarantee that covers the installation itself. Verify the following before signing any agreement:
- The length of the material warranty and what parts it includes.
- Whether labour is covered under a separate contractor guarantee.
- The process for filing a claim if a leak appears.
These details separate a dependable gutter installation from an unverified claim.
Safety Considerations When Working at Height
Rainy seasons in Johannesburg or Cape Town turn neglected gutters into a flood risk, yet the remedy often begins on a ladder. A DIY homeowner faces a physical puzzle: each section of moulded aluminium requires repositioning the ladder, cutting with precision, and applying sealant while maintaining balance. The effort compounds with every storey of the house.
Professional contractors treat height as a hazard to be managed. Their training involves rigging systems and spotter protocols that are invisible to the client. Consider these safety steps they follow:
– Verify the ladder’s weight rating against the worker’s gear.
– Clear the drop zone of kids, pets, and garden furniture.
– Inspect the wall surface for loose bricks or rotting fascia.
These precautions consume minutes but prevent hours of emergency care. When you hire a professional for gutter installation, you are paying for their discipline under pressure. The physical labour is a fraction of the value. The risk transfers from your body to their training.


0 Comments